Are you struggling with user retention? The truth is, your first 90 days are critical. This guide on SaaS onboarding checklist provides a full customer onboarding checklist template and top user onboarding best practices. We’ll explore powerful SaaS churn reduction strategies to help you improve user activation rate and slash your SaaS time to value. Let’s transform your new user onboarding flow. At KraftedCopy, we excel at creating long-form blogs that drive conversions. We believe a great user experience starts with great communication. This post will show you exactly how to reduce SaaS churn by mastering onboarding. Your journey to lower churn starts now.
Why Onboarding Is Your #1 Churn Buster
Let’s start with a hard truth. Most users who sign up for your SaaS will leave. Many of them will vanish within days. They don’t leave because your product is bad. They leave because they never understood its value. This is where onboarding comes in. It’s not just a welcome tour. It’s your first, best chance to prove your product’s worth.
Think of it this way. You’ve spent a fortune on marketing. You’ve crafted the perfect ads. Your landing page converts like a dream. A new user finally signs up. Success! But the real work has just begun. The journey from “new signup” to “loyal advocate” is paved with good onboarding. Without it, you’re just pouring water into a leaky bucket.
The Leaky Bucket Problem
Churn is that silent killer of SaaS growth. You work hard to acquire new customers. Yet, for every two you gain, one quietly slips away. This is the leaky bucket syndrome. You can’t out-acquire a bad retention problem. It’s exhausting and expensive.
Effective onboarding plugs those leaks. It’s one of the most powerful SaaS churn reduction strategies available. When users immediately see how your product solves their problem, they stick around. They become engaged. They upgrade. They tell their friends. This is how you build a sustainable business.
Understanding Key Onboarding Concepts
Before we dive into the checklist, let’s define some terms. Knowing these will help you focus your efforts.
- Time to Value (TTV): This is the time it takes for a new user to realize the value of your product. Your goal is to make your SaaS time to value as short as possible. The faster they get a win, the more likely they are to stay.
- User Activation: This is the point where a new user performs a key action in your app. This action indicates they are truly “using” the product. Defining this “activation event” is crucial. It’s a major milestone in the new user onboarding flow.
- The “Aha!” Moment: This is the emotional reaction to realizing value. It’s when the user thinks, “Aha! This is why I signed up.” Your onboarding must be engineered to deliver this moment quickly.
- Churn Rate: The percentage of customers who cancel their subscription over a given period. Your mission, should you choose to accept it, is to crush this number.
Mastering these concepts is the first step. Next, we’ll explore the principles that make it all happen.
User Onboarding Best Practices You Can’t Ignore
A great onboarding experience isn’t an accident. It’s designed. It follows a set of proven principles. Ignoring these is a common reason why so many companies struggle with how to reduce SaaS churn. Let’s break down the foundational user onboarding best practices that form the backbone of any successful strategy.
Personalize the Journey
Your users are not all the same. They have different roles. They have different goals and technical skills. A one-size-fits-all onboarding flow will fail most of them. It feels generic and unhelpful. Personalization makes the user feel seen and understood.
How can you personalize the experience?
- Ask Upfront: Use a simple welcome screen to ask about their role or main goal. “What brings you here today?” or “What’s your primary role?”
- Segment Users: Based on their answers, guide them down different paths. A marketer needs to see different features than a developer.
- Use Their Data: Address them by name. Reference their company. These small touches make a big difference.
Personalization shows you care. It immediately demonstrates that your tool is built for them, not just for anyone.
Focus on Quick Wins
New users are impatient. They want to see results, and they want to see them now. Don’t show them every single feature your product has. That’s overwhelming. Instead, focus on guiding them to one small, meaningful victory. This is all about reducing the SaaS time to value.
What constitutes a “quick win”?
- For a project management tool, it might be creating their first task.
- For an email marketing platform, it could be sending a test email to themselves.
- For a social media scheduler, it’s scheduling their first post.
This first win builds momentum. It creates a positive feedback loop. The user feels competent and successful. They are now motivated to explore more.
Guide, Don’t Dictate
Remember those old product tours? The ones that forced you to click “Next” twenty times? They showed you every button and menu, whether you cared or not. This approach is dead. Today’s users want to learn by doing.
Instead of a rigid tour, use interactive guides.
- Use Tooltips: These small pop-ups appear as the user explores. They offer context-sensitive help exactly when it’s needed.
- Create Checklists: An onboarding checklist gives users a sense of direction and accomplishment. They can see their progress and choose what to do next.
- Let Them Explore: Don’t lock the UI. Allow users to click around freely. Your guidance should be a helpful layer on top, not a straitjacket.
The goal is to empower the user, not to control them.
Communicate Across Channels
Onboarding doesn’t just happen inside your app. It’s a multi-channel conversation. Your email inbox is a powerful tool for re-engaging users and reinforcing value. A well-planned email sequence is essential to improve user activation rate.
Your onboarding emails should be as compelling as a conversion-focused blog post. At KraftedCopy, we specialize in creating long-form blogs & articles for conversions that guide readers to a conclusion. Your email sequence should do the same for your users.
- Welcome Email: Send it immediately. Confirm their signup and set a positive tone.
- Educational Drips: Send a series of emails over the first few weeks. Each one should highlight a specific feature or use case.
- Behavior-Based Emails: Is a user stuck? Send them an email with a link to a help doc. Did they complete a key action? Send a congratulatory email.
This creates a cohesive experience. It reminds users of your product’s value even when they aren’t logged in.
Celebrate Progress
Everyone loves to be recognized for their accomplishments. Onboarding is the perfect place to use a little positive reinforcement. Celebrating milestones makes users feel good. It encourages them to keep going.
How can you celebrate progress?
- Success Messages: Display a fun message or animation when they complete a key task. “You did it! Your first project is live!”
- Progress Bars: Visuals like progress bars or checklists show users how far they’ve come.
- Badges and Rewards: For more complex products, gamification elements can work wonders. Unlock a new feature or award a “Power User” badge.
These small moments of delight turn a functional process into an enjoyable experience. They build an emotional connection to your brand.
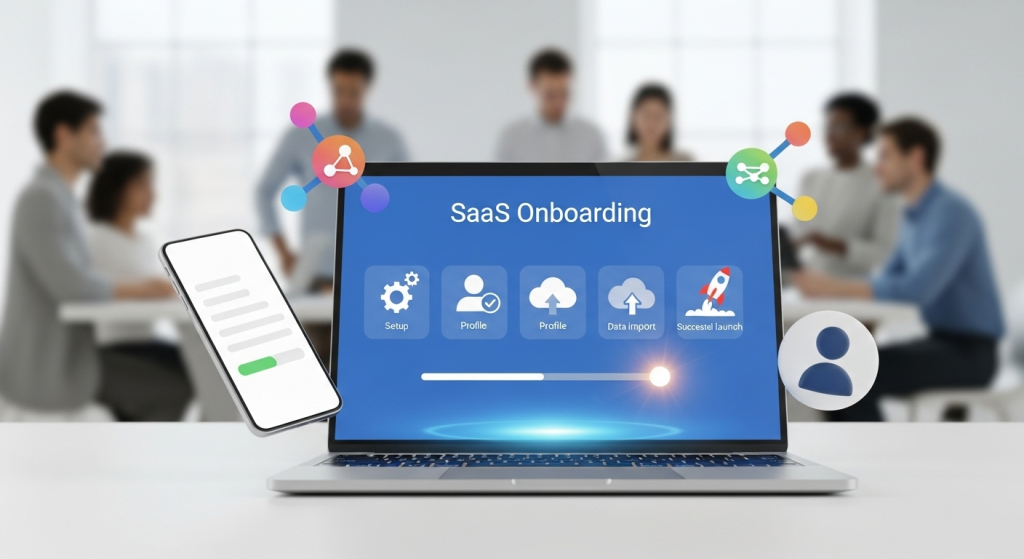
The Ultimate 90-Day SaaS Onboarding Checklist Template
Now for the main event. Here is a detailed, phase-by-phase checklist. This customer onboarding checklist template breaks the first 90 days into four critical stages. Think of this as your master plan to create a world-class new user onboarding flow.
Phase 1: The First 24 Hours (Activation & First Value)
This is the most critical phase. You have a very short window to make a great first impression. The goals here are simple: get the user to their “Aha!” moment and achieve that first quick win. Failure here often leads to immediate churn.
Step 1: Nail the Welcome
The moment a user signs up, the clock starts ticking.
- [ ] The Frictionless Signup: Make your signup form as short as possible. Only ask for what’s absolutely necessary. Can you use social logins (Google, etc.) to make it even faster?
- [ ] The Immediate Welcome Email: This email must be instant. It should do three things:
- Warmly welcome the user by name.
- Confirm their account details.
- Provide one clear, compelling call-to-action (CTA) like “Log In and Get Started.”
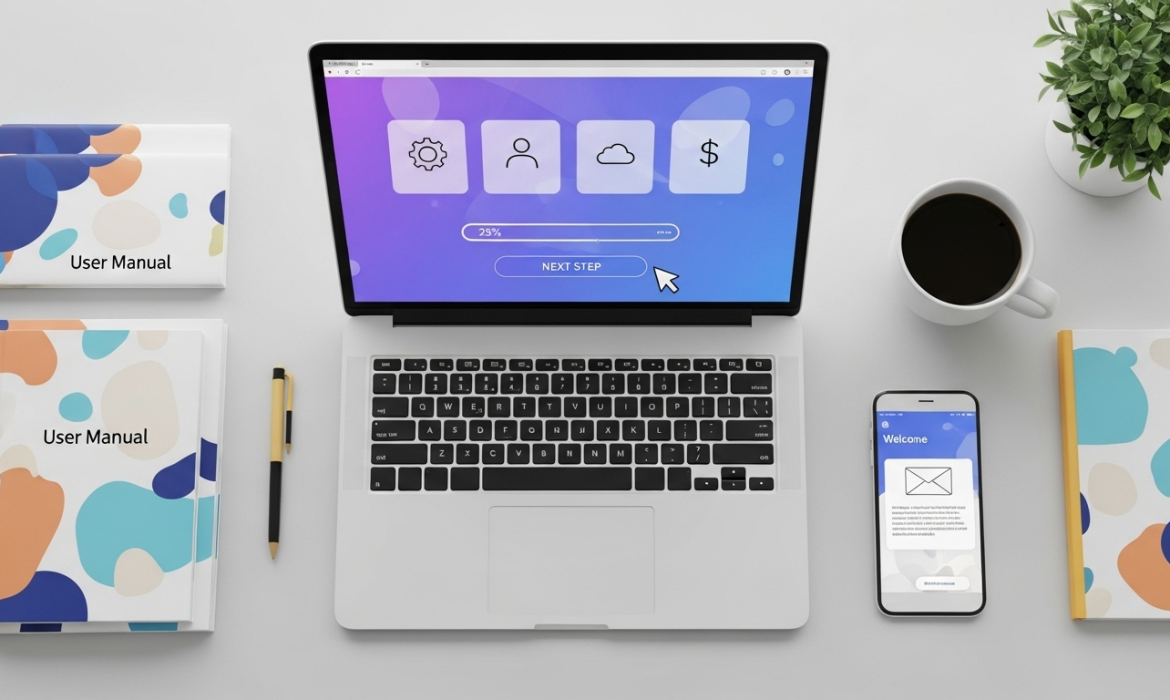
- [ ] The In-App Greeting: When they log in for the first time, don’t just dump them on a blank dashboard. Greet them with a personalized welcome modal. This is a great place to ask about their goals to personalize the rest of the experience.
Step 2: The Focused First Login
A blank, empty state is intimidating. It screams “You have a lot of work to do.” Your job is to make this first screen inviting and actionable.
- [ ] The Personalized Welcome Screen: Use the information you gathered (role, goal) to tailor the first screen.
- [ ] The “One Thing” Focus: What is the single most important action a user needs to take to get value? Design the entire first-run experience around that one thing. Hide or de-emphasize everything else for now.
- [ ] Interactive Guidance: Use tooltips or an interactive walkthrough to guide them through this first key action. Don’t just tell them; help them do it. For example, instead of a tooltip saying “Click here to create a project,” have the tooltip point to the button and prompt them to name their first project right there.
Step 3: Engineer the “Aha!” Moment
This is the payoff. This is where the user sees the magic. The “Aha!” moment is the direct result of the “quick win” you helped them achieve.
- [ ] Identify Your “Aha!”: You must know what this moment is for your product. Talk to your most successful customers. When did they “get” it? Was it seeing their data visualized? Was it collaborating with a teammate for the first time?
- [ ] Clear the Path: Remove every possible obstacle between signup and this moment. Every extra click, every confusing field, is a risk.
- [ ] Celebrate the Win: Once they achieve it, celebrate! A success message, a little confetti animation, a congratulatory pop-up. Reinforce that they have just done something important.
Table: Onboarding Checklist for the First 24 Hours
| Task ID | Action Item | Status (Not Started / In Progress / Complete) | Owner | Notes |
|---|---|---|---|---|
| P1-01 | Optimize signup form for minimum friction. | Marketing/Product | Only ask for email and password initially. | |
| P1-02 | Set up an instant, personalized welcome email. | Marketing | CTA: “Log in and create your first [Key Action]”. | |
| P1-03 | Design an in-app welcome modal that segments users. | Product/UX | Ask “What is your main goal?” | |
| P1-04 | Map the user journey to the first “quick win.” | Product/UX | Focus on one core action. | |
| P1-05 | Implement interactive tooltips for the first-run experience. | Engineering | Use a tool like Appcues, Userguiding, or build in-house. | |
| P1-06 | Design a success state/celebration for achieving the “Aha!” moment. | UX/UI | Make it delightful and reinforcing. | |
| P1-07 | Set up a “Stuck User” trigger email. | Marketing | If a user signs up but doesn’t activate in 24h, send a help prompt. |
Phase 2: The First Week (Days 2-7) – Build Habits & Explore
The user had a good first experience. Great! Now you need to turn that initial interest into a regular habit. This week is about encouraging them to come back and start exploring the wider value of your product.
Step 1: Reinforce Value with an Email Drip Campaign
Your email campaign is your primary tool for re-engagement. Don’t just send generic “come back!” messages. Send value.
- [ ] Day 2: The “What’s Next” Email: The user achieved their first win. Now, what’s the logical next step? Send an email that suggests a second, valuable action. Frame it as a tip: “Pro-Tip: Did you know you can also [do X] to save even more time?”
- [ ] Day 4: The Use Case Spotlight: Showcase a powerful way to use your product that they might not have discovered. Tell a mini-story. “See how teams like yours are using [Feature Y] to boost productivity.”
- [ ] Day 6: The Social Proof Email: Share a short testimonial or a link to a case study. This builds confidence and trust. “ACME Corp. increased their efficiency by 30% with our tool.”
Think of these emails as mini-tutorials. They function much like the high-converting long-form blogs & articles for conversions we produce at KraftedCopy, educating users and leading them to take valuable actions.
Step 2: Introduce Secondary Features Gradually
The user has mastered the core action. Now you can start to reveal more of the product’s power. The key is to do this contextually, not all at once.
- [ ] Contextual Feature Prompts: When a user completes Action A for the third time, maybe a tooltip appears. “Looks like you’re a pro at this! Ready to try the more advanced [Feature B]?”
- [ ] The Onboarding Checklist: If you implemented a checklist, now is the time to encourage them to tick off the next item. This gives them agency over their learning journey.
- [ ] Empty State Opportunities: If they navigate to a part of the app they haven’t used yet, don’t just show a blank screen. Use that space to explain the feature’s value and provide a CTA to get started.
Step 3: Offer Proactive Support
Many users who get stuck will simply leave. They won’t bother searching your help docs or contacting support. You need to reach out to them first.
- [ ] Proactive Live Chat: Set up triggers for your live chat tool. If a user is lingering on a certain page for too long, have a chat window pop up. “Hey [Name], looks like you’re setting up your integrations. Can I help with anything?”
- [ ] The Personal Check-In: For high-value trials, a personal email from a “Customer Success Manager” around Day 5 can work wonders. It doesn’t have to be automated. “Hi [Name], I’m [CSM Name]. Just wanted to check in and see how you’re finding things. Any questions so far?”
- [ ] In-App Help Center: Make your help resources incredibly easy to find. A prominent “Help” or “?” icon should be on every page.
This proactive approach is a core part of modern SaaS churn reduction strategies. It shows you’re invested in their success.
Phase 3: The First Month (Days 8-30) – Deepen Engagement & Gather Feedback
By now, the user should be comfortable with the basics. This month is about transforming them from a casual user into an engaged fan. You want to make your product an indispensable part of their workflow.
Step 1: Showcase Advanced Use Cases
Go beyond the basics. Show them how to become a power user. This is where you can leverage more in-depth content.
- [ ] Host a “Getting Started” Webinar: Invite all users in their second or third week to a live webinar. Show them tips and tricks and end with a Q&A session. Record it for those who can’t attend.
- [ ] Share In-Depth Case Studies: Send emails with links to detailed case studies relevant to their user segment. This helps them connect the dots between features and real-world business results.
- [ ] Create Advanced Tutorial Videos: Create a library of short, focused videos that explain how to use your more complex features. Promote these within the app to users who have demonstrated proficiency with the basics.
Step 2: Solicit Early Feedback
The first month is the perfect time to ask for feedback. The experience is still fresh in their minds. They can give you invaluable insights into your onboarding process.
- [ ] The In-App Microsurvey: After a user has been active for a couple of weeks, trigger a simple, one-question survey. “On a scale of 1-10, how easy was it to get started with our product?”
- [ ] The Feedback Email: Send an email asking for their thoughts. Keep it open-ended. “We’d love to hear about your experience so far. What’s one thing we could do to make it better?”
- [ ] Offer an Incentive: For more detailed feedback, consider offering an incentive like a small gift card or a discount. “Share your feedback in a quick 15-minute call and get a $25 Amazon gift card.”
Acting on this feedback is crucial. It shows your users that you listen.
Step 3: Connect Users with a Community
People are more likely to stick with a product if they feel like they’re part of something bigger. A community builds a moat around your business.
- [ ] Promote Your User Forum: If you have a forum or a Slack/Discord community, invite your engaged users to join. This is where they can learn from peers and feel a sense of belonging.
- [ ] Share User-Generated Content: Did a user post a great tip on Twitter? Share it in your newsletter (with their permission). This celebrates your users and provides value to others.
- [ ] Create User Groups: For larger products, consider creating special interest groups within your community, e.g., “Marketers using [Your Product]” or “Developers’ Corner.”
Table: Onboarding Checklist for Days 8-30
| Task ID | Action Item | Status | Owner | Notes |
|---|---|---|---|---|
| P3-01 | Schedule and promote a weekly “Getting Started” webinar. | Marketing/CS | Invite all users in their 2nd week. | |
| P3-02 | Develop an email drip campaign with advanced use cases and case studies. | Content/Marketing | Segment this content based on user role. | |
| P3-03 | Implement an in-app microsurvey to collect onboarding feedback. | Product | Trigger after 14 days of activity. | |
| P3-04 | Set up a process for Customer Success to review and act on feedback. | CS/Product | Close the loop with users who provide feedback. | |
| P3-05 | Create an email to invite active users to your community forum/Slack. | Community/Marketing | Trigger based on activity level (e.g., 5+ logins). | |
| P3-06 | Build a library of advanced feature tutorial videos. | Content/CS | Link to these from within the app contextually. |
Phase 4: The First 90 Days (Days 31-90) – Solidify Loyalty & Drive Advocacy
If a user is still active after 30 days, you’ve done a great job. They’ve likely integrated your product into their routine. This period is about reinforcing the long-term value and turning happy customers into vocal advocates. This is the final step in mastering how to reduce SaaS churn.
Step 1: Help Them Measure Success & ROI
Your user feels like your product is helping. Now, help them prove it. Provide them with the data they need to justify the subscription to their boss (and to themselves).
- [ ] Introduce the Dashboard/Reporting Features: If you haven’t already, now is the time to guide them to your analytics section. Use tooltips to explain what the key charts mean.
- [ ] Send a “Monthly Performance Report” Email: Automatically generate a simple email that summarizes their activity and achievements from the past month. “You’ve created 27 projects and completed 158 tasks this month! That’s a 15% increase in productivity.”
- [ ] Offer a Business Review: For high-ticket B2B customers, offer to schedule a 30-minute call to review their account. Help them understand the ROI they’re getting and suggest ways to get even more value.
Step 2: Nurture Your Power Users
Identify your most active and engaged users. They are your greatest asset. Treat them like VIPs.
- [ ] Create a “Power User” Segment: Tag these users in your CRM and email platform.
- [ ] Offer Beta Access: Invite them to private betas for new features. This makes them feel special and gives you invaluable pre-launch feedback.
- [ ] Provide Direct Access: Give them a direct line to a senior support person or even a product manager. Their insights are gold.
Step 3: Plant the Seeds of Advocacy
Happy, successful users are often willing to spread the word. You just have to make it easy for them.
- [ ] The Smart Ask for a Review: Don’t just blanket-ask everyone for a review. Trigger the ask at a moment of success. For example, right after they export a positive-looking report, pop up a message: “Glad to see you’re getting great results! Would you be willing to share your experience on G2/Capterra?”
- [ ] Launch a Referral Program: Make it a win-win. “Give a friend a 20% discount and get a $50 credit when they sign up.” Promote this to your engaged users.
- [ ] Ask for Testimonials: Personally reach out to your power users. Ask if they’d be willing to provide a testimonial or participate in a case study. Most will be flattered and happy to help.
By Day 90, a user who has gone through this process is no longer just a user. They are a partner. They are deeply invested in your product and are highly unlikely to churn.
How to Reduce SaaS Churn: Avoiding Onboarding Mistakes
Building a great onboarding flow is as much about avoiding pitfalls as it is about implementing best practices. Many well-intentioned teams make the same mistakes. Here are the most common traps and how to sidestep them.
The “One-Size-Fits-All” Trap
We touched on this earlier, but it’s worth repeating. Treating every user the same is a recipe for failure. A marketing manager has vastly different needs from a freelance designer.
- The Mistake: A single, generic product tour that highlights features irrelevant to half your audience.
- The Fix: Use a simple welcome screen to segment users by role or goal. Then, deliver a tailored onboarding path that focuses only on what’s relevant to them. This simple step can dramatically improve user activation rate.
The Front-Loaded Feature Dump
You’re proud of your product. It has 107 amazing features! It’s tempting to show them all off at once. This is a massive mistake. It’s like trying to drink from a firehose.
- The Mistake: A long, unskippable tour that points out every single button and menu on the first login. Users feel overwhelmed, get bored, and click away.
- The Fix: Focus relentlessly on the “one quick win.” Guide the user to perform one single, high-value action. Defer everything else. Introduce other features later, once the user has built a foundation of understanding and confidence.
Forgetting the Human Touch
Automation is wonderful. It allows you to scale your onboarding. But relying on it 100% can make your brand feel cold and robotic. People still want to connect with people.
- The Mistake: Every email is clearly automated. There’s no way to reply or talk to a real person. Support is buried behind a 10-step FAQ.
- The Fix: Mix in personal touchpoints. A personal check-in email from a named Customer Success Manager. Proactive live chat invitations. Offering to hop on a quick call. These human interactions build trust and loyalty, which are powerful weapons against churn.
Setting and Forgetting
Your product is constantly evolving. You ship new features. You redesign parts of the UI. Your customers’ needs change. Your onboarding process cannot be static.
- The Mistake: You design your onboarding flow once and then don’t touch it for two years. New features are added without being incorporated, and old instructions point to things that no longer exist.
- The Fix: Treat your onboarding as a product, not a project. It needs continuous iteration. Review your onboarding metrics weekly. Read user feedback. Watch session recordings. Just as a great blog post needs updates to stay relevant—a service we know well at KraftedCopy when refreshing long-form blogs & articles for our clients—your onboarding flow requires constant refinement. Schedule a quarterly review to ensure it’s still effective and up-to-date.
Key Metrics to Improve Your User Activation Rate
You can’t improve what you don’t measure. A data-driven approach is essential for optimizing your new user onboarding flow. Tracking the right metrics will tell you exactly where your process is succeeding and where it’s failing.
Time to First Value (TTFV)
This is arguably the most important onboarding metric. It measures the time from signup to the user’s “Aha!” moment.
- How to Measure: Define your “Aha!” moment as a key activation event (e.g., “first_project_created”). Then, calculate the median time between the “user_signup” event and this activation event for all new users.
- Why it Matters: A shorter TTFV correlates directly with higher long-term retention. Your primary goal should be to drive this number down.
User Activation Rate
This metric tells you what percentage of new users are successfully completing your core activation event.
- How to Measure: (Number of new users who complete the activation event within X days / Total number of new users in that period) * 100. A 7-day window is a common starting point.
- Why it Matters: A low activation rate is a major red flag. It means your onboarding is failing to demonstrate value, and you are likely bleeding new signups before they even get started. This is a critical metric to improve user activation rate.
Feature Adoption Rate
This measures the percentage of users who use a specific feature. It’s useful for tracking how well you’re introducing secondary features after the initial “Aha!” moment.
- How to Measure: (Number of active users who have used Feature X / Total number of active users) * 100.
- Why it Matters: It helps you understand which features are resonating with users and which are being ignored. Low adoption of a key feature might mean you need to improve how you introduce it during onboarding.
Onboarding Completion Rate
If you use a checklist or a defined multi-step flow, you can measure how many people actually finish it.
- How to Measure: (Number of users who complete the final step of the onboarding flow / Number of users who started it) * 100.
- Why it Matters: A large drop-off at a specific step tells you exactly where you have a problem. Is Step 3 too confusing? Is Step 4 asking for too much information? This gives you a precise target for optimization.
Churn Rate by Cohort
This is the ultimate measure of success. It’s crucial to look at churn by cohort—meaning, you group users by the month they signed up.
- How to Measure: Track the churn rate for the “January Cohort,” “February Cohort,” etc.
- Why it Matters: As you make improvements to your onboarding, you should see the churn rate for newer cohorts (e.g., the March cohort) be lower than for older cohorts (the January cohort). This proves your changes are working.
Table: Key Onboarding Metrics at a Glance
| Metric | What It Measures | Why It’s Important | How to Improve It |
|---|---|---|---|
| Time to First Value (TTFV) | Speed to the “Aha!” moment. | Predicts long-term retention. | Simplify the first-run experience; remove friction. |
| User Activation Rate | % of users hitting the key activation event. | Shows if onboarding is demonstrating core value. | Clarify the main CTA; provide better interactive guidance. |
| Feature Adoption Rate | % of users using a specific feature. | Indicates how well you’re educating users beyond the basics. | Use contextual tooltips; create targeted email campaigns. |
| Churn Rate (by Cohort) | % of users from a signup period who cancel. | The ultimate test of your retention efforts. | Improve all of the above; implement the full 90-day plan. |
Your Onboarding Journey Begins Now
We’ve covered a lot of ground. From the core principles of great onboarding to a detailed 90-day checklist, you now have a comprehensive blueprint for transforming your user experience. Remember, effective onboarding isn’t a feature; it’s the foundation of a successful, high-growth SaaS business. It is the single most powerful lever you can pull to reduce churn, increase activation, and build a base of loyal, happy customers.
Don’t be intimidated by the scope of this plan. Start small. Focus on Phase 1—the first 24 hours. Nailing that initial experience will have the biggest and most immediate impact. From there, you can progressively build out the rest of the 90-day journey. The key is to start now, to measure your results, and to never stop iterating.
Crafting an exceptional onboarding experience takes dedication, insight, and a commitment to clear communication. Similarly, crafting content that educates and converts requires expertise. If you want to attract and retain the right kind of users with powerful long-form blogs & articles for conversions, see how KraftedCopy can build a content engine that drives real results for your SaaS. Your users deserve a great experience from the very first click. It’s time to deliver it.